Sunday, December 18, 2011
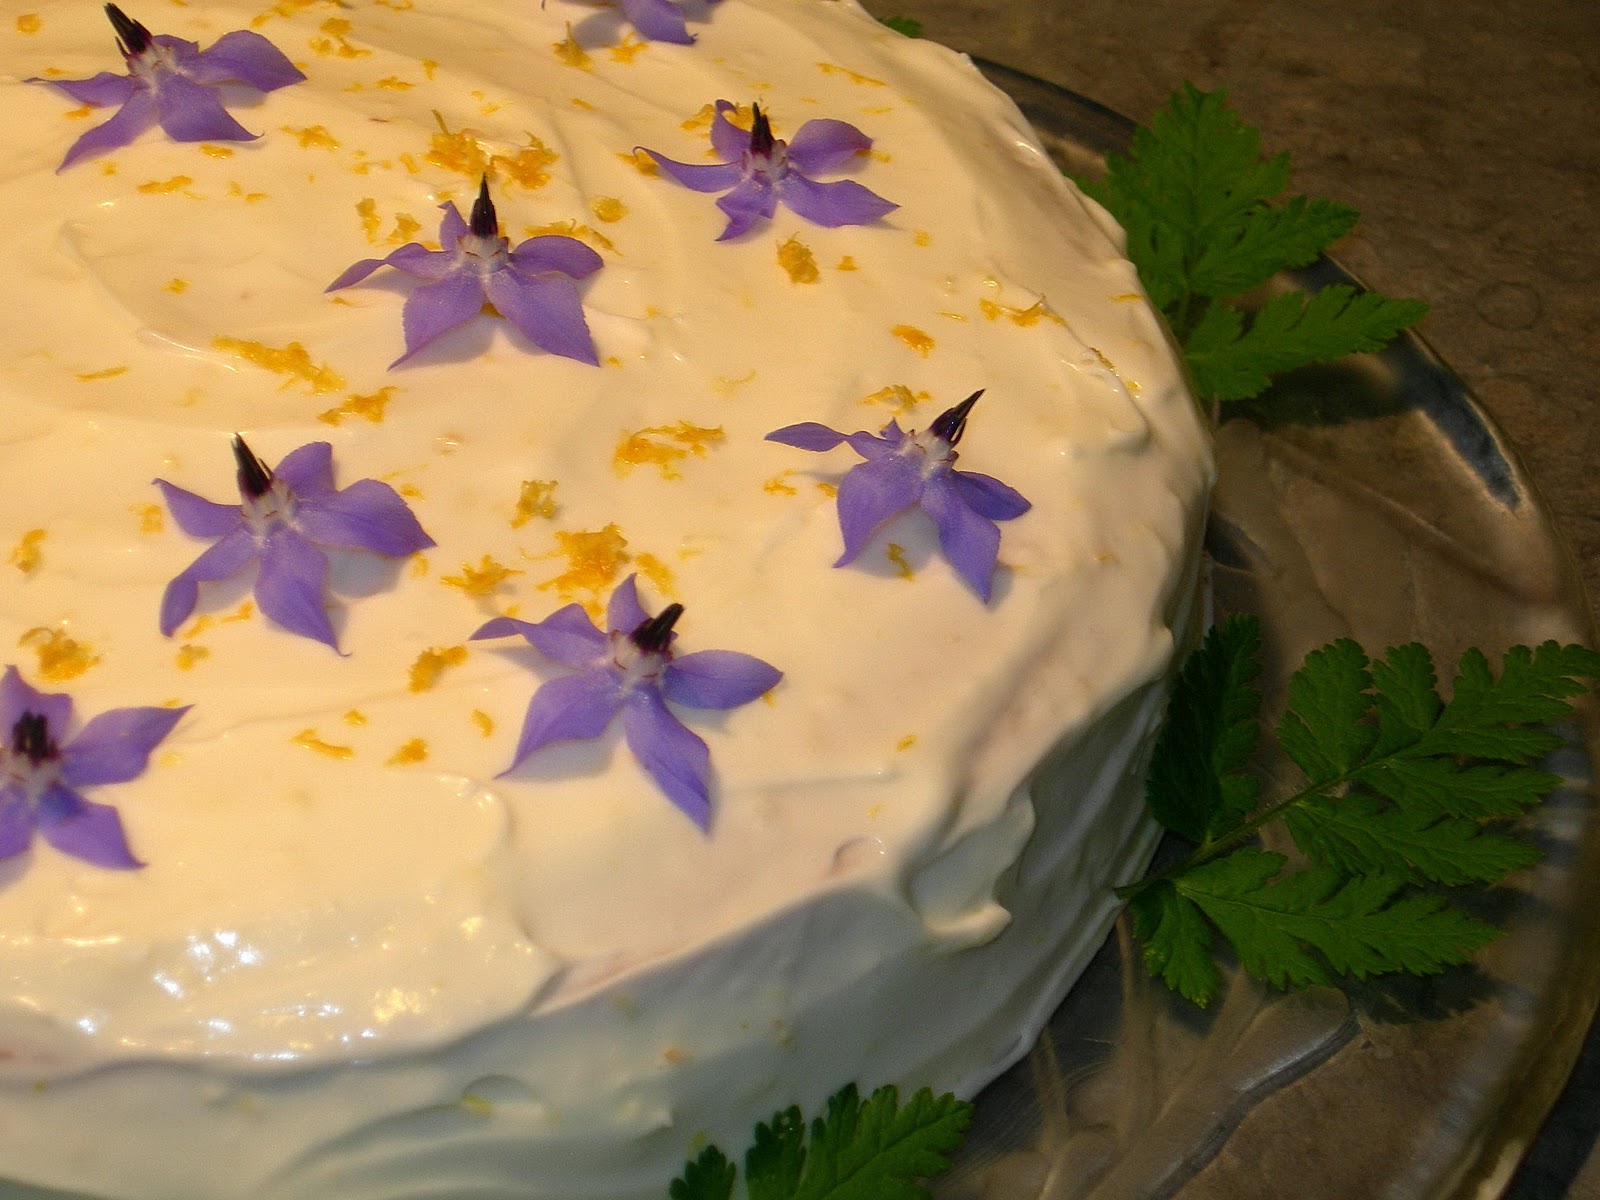
Meyer Lemon Almond Torte - Passed the Test!
Peter, my brother-in-law, became accustomed to having dessert when my mom stayed at his home a few months back. When mom left, his sweet tooth didn't and so he was forced to make his own cake. He tried my Meyer Lemon Almond Torte which was posted back in March and took this picture. What a good looking specimen for someone who doesn't bake! I hear it was delicious too :)


Crisp, Chewy Pizza From Your Home Oven
I don't know about you, but I'm tired of friends telling me they're on a low carb diet. Boh-ring! That only makes me want to eat more bread and pasta. So here's a recipe from Peg, who makes her own pizza dough. (I'm too lazy.)

 Toppings
 That said I always use fresh mozzarella, thinly sliced and placed on paper towels to drain a bit before topping pizza and the moisture hasn’t been a problem. But in general I think it is a good idea to drain any toppings that have a lot of juice in them so that the crust will maintain its integrity during baking. I’ve included pictures of a couple favorites I’ve made—Prosciutto and Caramelized Onion; and Roasted Zucchini, Roasted Garlic, and Olive. But plain old pepperoni was also delicious. It’s fun to experiment and most any veggie you can roast and any cheese or meat you like can be used.
Pizza Dough (makes 4/10 inch or 2/18 inch pizzas)

2 cups warm water
1 tbsp yeast
1 tbsp sugar
1 tbsp olive oil (plus more for brushing if desired)
1 to 2 tsp kosher salt (depending on desired flavor)
5 cups unbleached flour, plus up to 1 cup more if needed
In bowl combine water, yeast, sugar oil and salt and let sit until foamy, about 10 minutes. By hand or using bread hook on mixer, stir in 5 cups flour and more as needed to make a soft dough—if using a mixer the dough will begin to clean the sides of the bowl. Transfer to lightly floured board and knead until smooth and not sticky (about 8 minutes if by hand). Divide into two or four equal portions depending on the size pizzas you want. At this point you can freeze some of the dough if desired. Just wrap in plastic and place in a freezer bag with label. Otherwise place balls away from each other on a well floured board or baking sheet. Sprinkle flour over the tops and cover with a kitchen towel or parchment paper and then cover with plastic wrap. Let rise until tripled; 2 or more hours depending on the temperature in your home. Using your fingers or a rolling pin if easier, stretch the dough to desired size, leaving the edge a bit thicker, and place on a sheet of parchment. Cover with a towel and let rise about 30 minutes before covering with desired toppings. During the last ½ hour to hour of this rising and preparation process, place a pizza stone on a rack in the bottom third of the oven and turn oven on to 500 degrees…this will heat up the oven and stone for a great crust. If you have a pizza peel, you can use it to transfer your completed pizza, on the parchment, to the stone (you’ll need to bake one at a time unless you have a convection oven). Otherwise, you can use a rimless baking sheet to make the transfer. If making larger size pizzas, it is easier to bake it on a pizza pan or baking sheet (with parchment underneath) until the pizza crust has firmed up at which point you can then transfer it directly to the stone to finish baking so that the crust will have the correct chew and crispness. The parchment under the dough makes the transferring much easier than just using cornmeal as in some recipes.
 Toppings
Thursday, November 24, 2011
Cranberry Orange (Tangerine) Muffins

Woke up this Thanksgiving Day realizing I had not given a thought to breakfast. Not much in the fridge, but just the right ingredients for these moist and delicious muffins. They were pretty decadent, warm out of the oven and kissed with sweet butter.
1 ½ cups all purpose flour
½ cup whole wheat flour
1 cup sugar
1 ½ teaspoons baking powder
½ teaspoon salt
½ teaspoon baking soda
2 teaspoons grated orange or tangerine rind
¾ cup orange or tangerine juice
¼ cup canola oil
2 tablespoons plain greek yogurt
1 large egg, lightly beaten
2 cups fresh cranberries, chopped roughly
⅓ cup walnuts, toasted
½ tablespoon flour
⅛ cup flax seeds
2. In a large mixing bowl, whisk together the 2 cups flour, 1 cup sugar, baking powder, salt, and baking soda. Make an indentation in the middle.
3. In a large glass measuring cup, mix orange/tangerine rind, juice, oil, yogurt and egg. Pour mixture into flour indentation and stir until everything is just combined.
4. In a small bowl, stir dried cranberries, toasted walnuts, flax seeds and remaining 1/2 tablespoon flour. Stir into batter.
5. Divide batter evenly among muffin tins. Bake 15 minutes. Remove from tins and cool on a wire rack.
Friday, October 28, 2011
Easy Pear Tart with Marsala Glaze
This is a "mash-up" recipe that combines my sister Peggy's Easy Tart recipe and a variation on poached pear recipe from David Lebovitz. It's really pretty simple. I am not a baker, and this surprised me!

Poached Pears
3-4 cups water (enough to cover the pears)
1 cup good Marsala wine
1/2 cup honey
1 cinnamon stick
3-4 pears (Bosc, Bartlett...) - peeled, cored and quartered
In a large saucepan, heat the water, marsala and honey until warm and the honey is dissolved. Add the cinnamon stick. Slide in the pears and cover with a piece of parchment paper. (This is if you want the pears to remain under the water and not have variations in color. You can skip it.) Keep the liquid at a very low boil and simmer the pears until cooked through, 15 to 25 minutes, depending on the pears.
Remove pan from heat and let the pears cool in their liquid. Once cooled, remove pears and cinnamon with a slotted spoon to a plate. Turn the heat up to med-high to reduce the poaching liquid until it has the consistency of real maple syrup. This will take about 30-45 minutes. Keep an eye on it! It will thicken a bit more once cooled.

Poached Pears
3-4 cups water (enough to cover the pears)
1 cup good Marsala wine
1/2 cup honey
1 cinnamon stick
3-4 pears (Bosc, Bartlett...) - peeled, cored and quartered
In a large saucepan, heat the water, marsala and honey until warm and the honey is dissolved. Add the cinnamon stick. Slide in the pears and cover with a piece of parchment paper. (This is if you want the pears to remain under the water and not have variations in color. You can skip it.) Keep the liquid at a very low boil and simmer the pears until cooked through, 15 to 25 minutes, depending on the pears.
Remove pan from heat and let the pears cool in their liquid. Once cooled, remove pears and cinnamon with a slotted spoon to a plate. Turn the heat up to med-high to reduce the poaching liquid until it has the consistency of real maple syrup. This will take about 30-45 minutes. Keep an eye on it! It will thicken a bit more once cooled.
When ready to assemble the tart, slice the pears in thin slices to place on top of the tart.
Easy Tart Recipe
1 cup flour
½ cup sugar (divided)
¼ teaspoon baking powder
⅓ cup butter
1 egg
1 cup sour cream (light works too)
1 teaspoon vanilla
3 ripe Bartlett pears
Preheat oven to 400. In a food processor combine flour, ¼ cup sugar, and baking powder. Pulse a couple times. Add butter in tablespoons and process until butter is incorporated and mixture is crumbly—it won’t form a ball. Pour into a 9 or 10 inch tart pan and gently press over the bottom and up the sides at least half way. Bake in oven for 10 minutes. Meanwhile mix egg, sour cream, remaining sugar, and vanilla. Remove crust from oven and immediately pour the sour cream mixture into the hot crust. Return to the oven until the custard is set—10 to 15 minutes. Cool and top with prepared poached pears.

1 cup flour
½ cup sugar (divided)
¼ teaspoon baking powder
⅓ cup butter
1 egg
1 cup sour cream (light works too)
1 teaspoon vanilla
3 ripe Bartlett pears
Drizzle the marsala glaze over each slice to be served. Prepare to accept compliments!
Eggplant is Delicious...Really!
Here's a post from Peg who, by the way, grows practically everything she eats!

Eggplant is one of those veggies that people seem to either love or hate. Though I’m still not a huge fan, I do like it better now that I can get it either fresh from the garden or from the farmers market. Before growing it, most of the eggplant I’d eaten was bitter or too intense with ‘eggplant flavor’. If you don’t like it, you’ll know what I mean. In spite of all the salting, draining, squeezing, a too old eggplant will never taste good in my opinion. If you can get them fresh, not too large, while the skin is still glossy and the flesh is firm, you won’t need to do anything extraordinary to prepare it for your recipe. The taste should be mild and, since it absorbs oil and flavors, an enhancement to whatever condiments are used.
I’ve included a couple recipes with Italian preparations. Eggplant is often associated with Italian cooking, but it really is very versatile and found in a multitude of cuisines. These preparations are quite easy and tasty. I like them precisely because the eggplant does not overpower any of the other ingredients.
This is not a detailed recipe as you can be very personal with it and make as much or little as you wish. Since I’m not an avid lover of eggplant, I like this dish because it is not layered and therefore the sauce and cheeses play an equally important role.

 I normally use two good sized very fresh eggplants which I slice lengthwise about ½ inch thick. I then brush both sides of the slices with olive oil and grill them on my gas grill until dark grill marks show on both sides and the slices collapse somewhat. Alternately, you can put them under the broiler until some dark spots form. Then lay them in a single layer in a baking pan and season with salt and pepper. Lay a slice of mozzarella over the top--I cover about ½ to ¾ of each eggplant slab with cheese. If you use fresh mozzarella you will get some liquid in the bottom of the baking pan when cooked, but it is quite good. Then put a spoonful or two of good thick tomato sauce over the cheese, and sprinkle parmesan all over the tops. Pop into a 350 degree oven until the cheese melts and oozes, and the dish is bubbly.
Antipasto di Melanzana (Eggplant Appetizer)
Mom and I made this recently for guests and it was a big hit. We used small, very fresh eggplants so the flavor was mild.
2 lbs fresh firm eggplants
1 lb fresh tomatoes, peeled, seeded, and chopped fine
 1 ½ tbsp minced parsley
1 ½ tbsp minced basil
1 large clove garlic, minced (or more to taste)
4 tbsp olive oil
1 tbsp capers, chopped
Juice of ½ lemon (or more to taste)
¼ tsp red chili pepper
Salt and pepper to taste
Preheat oven to 400 degrees. Roast eggplant on a baking sheet until very soft (30 to 45 minutes depending on size). Cool, peel and halve the eggplants—if seedy remove seeds. Mash eggplant and mix in remaining ingredients. Serve with crisp crackers or bread. Also good as a topping for crostini.
Monday, September 19, 2011
Basil & Vegetable Tian
Here's a wonderfully simple end-of-summer dish from Peg that's great as a main vegetarian course or as a side dish. Heck, it would be great for breakfast with a poached egg or two. And don't forget some good bread to soak up all the healthy juices...
(A tian is a layered, baked vegetable dish that originated in Provence.)

(A tian is a layered, baked vegetable dish that originated in Provence.)
Basil & Vegetable Tian
4 bunches of leafy fresh basil, stemmed and coarsely chopped
4 or more ripe tomatoes sliced ¼ inch or so
3 to 4 medium zucchini or equivalent summer squash sliced thin
2 to 3 medium potatoes sliced thin (optional)
1 ½ to 2 cups grated cheese or mix of cheeses, depending on the flavor you want
Salt and pepper
Good fruity olive oil (¼ cup or so)
Preheat oven to 375 degrees.

Oil a shallow nonreactive baking pan. If using the potatoes, place them evenly on the bottom and sprinkle with salt and pepper. Then place the zucchini slices evenly over the potatoes (or bottom of pan if potatoes not used) and sprinkle with slat and pepper. Place all of the basil over the zucchini, then arrange the tomato slices evenly over the basil and sprinkle with salt and pepper. Add the cheese evenly over the top and drizzle the entire tian with olive oil. Bake until cheese on top is a shiny golden brown and casserole is sizzling, about 45 to 50 minutes. If necessary you can brown the top under the broiler for a few minutes.
Tuesday, August 9, 2011
Pane Italiana (Italian Bread)
I made this special bread on Sunday to go with homemade lasagna al forno. Both recipes are in the Mangia e Taci cookbook, available through www.lulu.com. The bread is very simple, although making the shapes takes a little know-how. Here you see roses, pumpkins, and crescent rolls, before and after.


Subscribe to:
Posts (Atom)