Monday, March 28, 2011

Polpette- A Different Sort of Meatball

Personally, I've never liked the term "meatball." It just doesn't sound appealing to me. However, the italian word "polpette" is much more delicate, just like this version of not-your-usual-ball-of-meat. (See what I mean?) These aren't meant to be mixed in with spaghetti because they are a stand alone delicacy.  I'll be posting a more traditional spaghetti & meatball recipe soon!


From Mangia e Taci, The D'Orazi Family Cookbook. Forward by Peggy.


While visiting my parents during the preparation of this book, I asked my Mother how to make the polpette she used to make when we were children. I remember how I loved them as they were unlike any meatball I’d ever had—most of which seem like mini round burgers in a sauce. It was a mystery to me how she achieved that tender savory interior and the slightly crusty exterior, and they were never served in a sauce. She told me that they were made from leftover meat, especially Bollito, but that any leftover meat and cooked vegetables could be used. I’d been visiting for a few days, so we had some leftover steak, a chicken breast in mushroom sauce, and a baked potato, so she agreed to prepare some polpette so that I could document the procedure. She used to use a meat grinder to prepare these, but now swears by the food processor. Trust me, it’s a unique and delicious way to create a totally new meal out of leftovers that might otherwise never get eaten. You need to use your judgment a bit regarding the ingredients you use—if it seems as though they would work together in the same meal, they will probably make good polpette.


½ lb leftover cooked beef (steak, roast, boiled, etc., or you can use some fresh ground if needed)
½ small onion
2 large cloves garlic
½ cup Italian parsley leaves
1 teaspoon fresh chopped oregano or ¼ teaspoon dried
½ lb other cooked leftover meat (chicken, turkey, pork, lamb, ham, etc.); it’s fine even if there is sauce or vegetables with the meat
1 medium cooked potato or equivalent amount of leftover rice
2 slices bread soaked in ¼ to ½ cup milk or broth
2 ounces cheese, grated (preferably parmesan, but cheddar, Swiss, or most any hard cheese will do)
Salt and pepper
1 egg, beaten
Flour as needed
Oil for frying (canola, peanut, etc)

Put the beef in the food processor with the onion, garlic, and herbs and process until finely chopped—do not over process. Remove to a large bowl. Place the other ½ lb meat in the processor with the potato and soaked bread and process until finely chopped. Add to the beef mixture and stir in the cheese. Season with salt and pepper to taste, and stir in the egg. The mixture should not be too wet at this point and should hold together easily. You can add dry bread crumbs if it seems too wet, or a little milk or broth if it seems too dry. Make golf sized balls and flatten slightly. Heat about ½ inch oil in a heavy bottom skillet over medium heat. Dredge the polpette in flour and fry in batches until brown on all sides, adding oil as needed, and adjusting heat as needed. Drain on paper towels. Makes 15 to 20.

Mary’s comment: I’ve made polpette many times and each time a different way—it depends on what leftovers you have. I’ve used leftover pork loin and lunch meats (vs. beef), and leftover rice instead of potatoes. If the leftover meat has garlic in it, I use that garlic and don’t add any more. If the leftovers already have herbs, I don’t add any oregano or parsley. I’ve done it without adding the milk soaked bread and used bread crumbs. Funny thing is, no matter what goes into them, they always seem to taste the same—delizioso! One more thing…don’t forget the ketchup for dipping! Or serve them with the stuffed baked tomatoes in this book and you can forget about the ketchup.

Tuesday, March 22, 2011

Gabe's Cake - As delicious as it is beautiful!

Peggy did make use of the candied orange peel from a few posts ago. Lots of work, apparently, but what a beautiful work of art. I only wish she didn't live all the way in Portland. She always was a tease!


Well, I did use some of my candied orange peel to make the cake I talked about. I’ve decided to call it Gabe’s Cake after my son because I am impressed that he made it as a teenager with practically no baking experience. And, I, who’ve had years of experience found it a trying process. The result was delectable, however, so I will share the recipe which was adapted from Saveur magazine.

The Sponge Cake:

14 tbsp all purpose flour, sifted
4 eggs
1 egg white
½ cup plus 2 tbsp sugar
1 tsp vanilla
¼ tsp cream of tartar

Preheat the oven to 425. Butter an 8” spring form or 9” round cake pan and line the bottom with buttered parchment paper. Sift flour twice and set aside. Put 1 whole egg and 3 yolks in mixing bowl (a standing mixer is best due to mix time); reserve whites in a separate bowl along with additional white. Add sugar and vanilla to yolks and beat at medium speed until pale and fluffy (up to 8 minutes); set aside. Beat whites on medium low speed about 2 minutes or until frothy; add cream of tartar, increase speed to medium high and beat until stiff peaks form; 2 to 3 minutes. Using a rubber spatula, carefully fold 1/3 of the whites into the yolk mixture, and then fold in the remaining whites. Sift about ¼ of the flour into the egg mixture and gently fold it in. Continue to sift and fold ¼ of the flour at a time until all the flour is incorporated. Pour into a prepared pan and place in the oven. Lower the heat to 325 and bake until golden—about 30 minutes. Cool in the pan for 5 minutes then unmold, peel off parchment and cool on rack.

The Ricotta Filling:

2 ½ cups ricotta
6 tbsp confectioner’s sugar
¼ tsp cinnamon
½ cup chopped candied orange peel
1 ½ oz chopped semi sweet chocolate

Put ricotta, sugar, and cinnamon in a food processor and puree until smooth. Transfer to a bowl and refrigerate at least 2 hours. Fold in orange peel and chocolate and return to frig.

 The Ganache/Frosting:

1 cup heavy cream
3 ½ oz chopped milk chocolate
5 oz chopped semi sweet chocolate

Heat cream in saucepan and bring to boil over medium heat. Remove from heat, add chocolates, let sit 1 minute, then whisk until smooth and set aside to cool. Set in frig until thick enough to frost without dripping.

Assembly:

Cut cake into two layers. Place bottom layer on cake plate and spread on ½ of the filling. Place the 2nd layer on the filling and frost the sides and up over the top about 1” with the ganache. Spread the remaining filling over the top. Sprinkle the edges with chopped toasted almonds or hazelnuts if desired and decorate the top with shave chocolate and additional candied orange peel.

Sunday, March 20, 2011

Another Rainy Day Option - Minestra di Ceci (Garbanzo Bean Soup)


Another post from the family cookbook, Mangia e Taci. The comment at the end is from my niece Olivia. Intro by Peggy...

This is a soup I remember eating very often on Christmas Eve at the home of my father’s sister, Auntie Rosy. She was a woman ahead of her times, having made her own way in the world as a college professor of languages. Like my Dad, she was born in Montana and then moved back to Italy when she was in her early teens. She completed her education there, retained her perfect English, and returned to the states to pursue her career shortly after WWII. She was like a second mother to us, babysitting when my parents were away. She was always full of life, and a great conversationalist. I remember staying with her at her home in Oakland, CA where the wisteria bloomed down the banister. I’d be awakened by the singing of her canary and her cheerful attitude. Even as children, she treated us with respect as well as loving kindness. She never had children of her own (perhaps because her brother had enough to share!), and in fact did not marry until she was 60. Now, approaching 100 (102 now!), and having recently lost her husband who was over 100, she continues to inspire me. Perhaps the longevity is a testament to all the flavorful Italian meals. This soup was certainly a highlight of our holiday traditions. We would smell it as we walked in the door of Auntie Rosy’s home, redolent of rosemary, garlic, and the big parmesan rind she threw in the pot for added flavor. I no longer wait until Christmas Eve to enjoy this soup, as it is a comforting cold weather treat. Join it with a tossed salad and some good bread for a simple but hearty meal.

2 tablespoons olive oil
2 cans (15 oz.) or 3 cups cooked, dry garbanzo beans/chickpeas, drained
1 small onion chopped
4 cloves garlic, minced
1 tablespoon fresh rosemary, chopped, or 1 teaspoon dry
1 lb. fresh tomatoes, peeled and chopped, or 1can (28 oz.) plum tomatoes wit juice, chopped
8 cups chicken broth
½ Savoy cabbage, chopped
1 cup small pasta (preferably egg pasta, such as quadrattini)
Salt and freshly ground pepper to taste
Parmesan rind (optional)

In a large soup pot sauté the onion in olive oil over medium heat, until translucent. Add the garlic and rosemary and continue to sauté for two more minutes. Add the tomatoes, broth, chick peas, cabbage, and parmesan rind if available. Bring to boil then reduce heat to low. Season with salt and pepper to taste and simmer until the cabbage is tender (15 to 20 minutes). Before serving add pasta and cook until tender (about 15 minutes). Serve with grated parmesan cheese. Serves 6 to 8.

Olivia’s comment: “Mom this soup is sooo delicious and I don’t even like soup!”

Saturday, March 19, 2011

Onion Soup on a cold rainy day

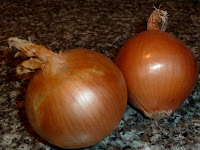
This is one of my mom's quick and delicious soups. I made it tonight and it was just the thing for a cold evening! It's very easy and so tasty. It's a take on the French version, I suppose. I forgot to take a picture of the finished product, but suffice it to say it looks like broth with onions in it! When you add the bread and melt the cheese on top, it's irresistible! If you try it, let me know what you think.

2 large yellow onions, sliced thinly
32 ounces chicken broth
1 cup white wine, sauvignon blanc (not pinot gris)
2 tablespoon butter
2 tablespoon olive oil
salt & pepper to taste
gruyere cheese, grated for top
thick slices of pugliese or other dense bread, thickly sliced and toasted (one per bowl)

Melt butter with olive oil in stock pot. Add onions and saute over med-low heat, stirring occasionally, for about 20-25 minutes to caramelize. Onions should be soft and have a creamy texture. Add S&P to taste and mix. Add wine and broth Cover and simmer 5-10 minutes. Meanwhile toast the pugliese slices. Grate some gruyere (I use about 1/4 cup per bowl)

Put some soup in a bowl, top with bread slice and some more broth. Top with grated gruyere cheese and put in microwave on high for about a minute to melt the cheese or under a broiler.
Sprinkle top with parmesan.

Makes about 4 servings.

Sunday, March 13, 2011

Homemade Candied Orange Peel Isn't Just for Fruitcakes!


Here's another recipe from Peggy, with a sweet tease at the end...

To my mind, no food brightens an overcast climate as much as citrus. Whether it be a juicy grapefruit for breakfast or a squeeze of lemon or lime over a salad, the vivid acidity lets some light into an otherwise dark day. Of course beyond the juice, citrus fruits also have their peel to thank for adding ‘zest’ to a variety of dishes. A grating of it into a sauce, or a slip added to a drink can make the ordinary seem special.

I’m going to make a birthday cake for a friend, and I’ve been thinking about a cake that my son made me for my birthday about 20 years ago that I have never forgotten. It was a recipe in my newest issue of Saveur magazine at that time. He asked what kind of cake I wanted, so I just handed him the magazine and sure enough he made it…he was probably 18 or 19 and did not have a lot of baking experience, but did a great job. The cake was superb containing many of my favorite flavors…cheese, chocolate, and orange. It was along the lines of a Sicilian cassata, but not as dense. The sponge cake was light, the ricotta/cannoli like  filling was studded with candied orange peel and dark chocolate, and the top was covered with chocolate ganache—pure heaven!
Simmer the peels

Of course I intended to make it again sometime, but when I went back to clip the recipe, I could not find the magazine. Over the ensuing years, I thought about that cake, but never searched out the recipe until this year. The recipe actually called for candied fruit rather than orange peel, so I suppose you could use that, but trust me, the orange peel is divine. So, I had to candy the peel, because I have never found a good candied citrus peel on the market. And I’m sure it would cost more than I’d be willing to pay if I did find it.

After the peels have been scraped
It's not a difficult process; you just need to devote a bit of time to it. I usually buy organic navels, and save the peel in a baggy in the frig until I have about 6 oranges worth of peel. Then I put them in a stainless pot, cover with water, and simmer until the white is very soft and can be scraped or easily cut off the rind and discarded.  I then cut the remaining peel into small pieces and place in syrup made by bringing to a boil, 1 ½ cups sugar, ¾ cup water, and a scant ½ tsp of cream of tartar. Simmer the peel in the syrup about ½ hour or until it appears translucent.

Straining the peels
Turn up the heat to medium/medium high and boil until a candy thermometer reads about 230—a lot of the syrup will have boiled off and the peel will be glossy. Strain and cool then toss with a few tbsp of sugar.
The finished product!
I’ve also eaten strips of candied orange peel of which one half had been dipped in chocolate, so you could candy it in most any shape. And of course you can candy any kind of citrus peel I suppose. But I have an affinity for orange, especially with chocolate, and if my cake turns out I’ll show you why!


Wednesday, March 9, 2011

Meyer Lemon Almond Torte - Or a cake that dared to be different

I made this torte the other day. It was an experiment in baking (not wise) that turned out good (lucky). I actually brought it to guests (OK, in-laws) for dessert and had no clue what it was going to taste like. 
Fortunately it was delicious, or to quote my sistah-in-law Bliss, "F'in fabulous!" This was yet another recipe I tweaked; it was supposed to be a "cake." However, the substitution of almond meal flour for regular flour turned it into something very different. I have actually tweaked the recipe below a bit more because I don't think it needed all the oil or sugar I originally used. If you try it and it comes out of the oven with a concave shape, don't freak out. The edges should be pliable enough to push down to level it out a bit. This will make for a beautifully chewy "crust." And any other mistakes (I'll spare you the details here) can be covered up with the frosting.

2 ½ cups almond meal flour
1 teaspoon baking powder
½ teaspoon baking soda
½ teaspoon salt
3 Large eggs
1 ½ cups sugar
½ cup canola or corn oil
½ cup plus 2 tablespoons fresh Meyer lemon juice (divided)
2 teaspoons grated lemon zest (divided)
2 ½ teaspoons vanilla extract (divided)
1 cup sour cream
5 tablespoons (2/3 stick) unsalted butter, room temperature
4 ounces cream cheese, room temperature
2 cups powdered sugar

Oil bottom, sides 9-inch or 10-inch springform pan. Line bottom of pan with wax paper or parchment paper and oil the paper. Preheat oven to 325 degrees.

Sift flour, baking powder, baking soda and salt into medium bowl and set aside. In a large bowl, beat eggs and sugar with electric mixer on medium speed until thickened and lightened to a cream color, about 2 minutes.

On low speed, mix in oil, ½ cup lemon juice, 1 teaspoon lemon zest and 2 teaspoons vanilla until blended. Blend in flour mixture and incorporate the two, then mix in sour cream until no white streaks remain.

Pour batter into prepared pan. Bake on center rack of preheated oven until top feels firm and a toothpick inserted into center comes out clean, about 1 hour.

Let cake rest in pan 15 minutes, then run a knife around edge of cake and center tube to loosen it. When cooled, invert onto a serving plate. Discard paper liner. Leave cake, bottom side up, to cool and frost.

In large bowl, using electric mixer on low speed, beat butter, cream cheese, remaining 2 tablespoons lemon juice, remaining 1 teaspoon lemon zest and remaining 1/2 teaspoon vanilla until smooth. Beat in powdered sugar until frosting is smooth and fluffy, about 2 minutes.

Use a spatula to spread frosting over top, sides and in center hole of cake. Cake can be covered and stored in refrigerator up to 3 days. Serve cold or at room temperature. Makes 12 servings.

Sunday, March 6, 2011

Rapini Anyone? Two Delicious Originals!

This next post is written by my sister Peggy, who actually authored "Mangia e Taci." She involved the whole family in the book with recipe testing and commentaries. Our mom, Antonietta D'Orazi, was the inspiration and for the cookbook and the source for all the recipes. I'll tell you more about her later. 


If you are lucky enough to live in an area where there is a year round farmer’s market, the challenge to eat seasonally and locally is somewhat diminished. I live in the rainy NW, which, in spite of the weather, is one of the most abundant areas in terms of local and sustainable ingredients, from the Dungeness crab to various fungi, fruits, and vegetables. There are a few die-hard growers that continue to challenge Mother Nature through the winter to provide these local provisions. And I am very appreciative that my local farmer’s market made a commitment to the community to continue their efforts through the winter.

My recent trip provided me with local grass fed beef and pork, a variety of pears and apples, and my first bunches of spring broccoli raab (know as rapini in Italian)—and they were bright and beautiful! Spring greens excite me because I not only love them, but somehow feel they are an important source of the vitamins and minerals that the winter root vegetables and gray days have not provided.

I tend to keep preparation simple, and one of my favorite dishes with rapini is to combine them with garlic, olive oil and pasta. From here multiple variations are possible (i.e. I added a couple anchovies to the last prep), but I think it is important to warm the garlic in the oil first then add the greens and seasonings; and by all means do not over cook the greens—they should remain bright green. The flavor of rapini is slightly bitter, which I like, but for those that don’t, the addition of some dried tomatoes, or winter squash would add some sweetness.


So, support your local market and vendors and you will not only help your own health, but the health of your neighborhood economy. Maybe it’s time for ‘trickle up’ economics…


My other sister, Betty, just sent me the following very simple recipe for rapini...

Instead of cooking the rapini, wash them and cut off the toughest part of the stems.  Spin them in a salad spinner to get the excess water out.  Then put them in a salad bowl and drizzle olive oil, lemon juice, salt and pepper, and maybe some flavored salt if you like.  Let them sit for several hours.  The rapini will begin to wilt and become tender.  When you're ready to eat them, taste for seasoning and adjust to taste.  Yum!!!

Friday, March 4, 2011

It's Artichoke Season - Bet you've never had them like this!

Here's our first recipe post from our Northern Italian family cookbook Mangia e Taci. It's called Carciofi Al Tegame, which means "Artichokes in a Pot." It creates a broth that is lemony with a hint of anise and garlic. You should be sure to have some nice, dense French bread on hand to soak up the broth.

Carciofi Al Tegame
Artichokes In A Pot

Although you could serve this as an appetizer or first course, especially if you use smaller artichokes, we always ate it as our main course. Mom always used large chokes in season, and with the addition of salad and plenty of bread, it was a substantial meal. There would always be a couple of large bowls on the table to accommodate all the leaves we had dunked in the broth and scraped across our teeth in our efforts to reach the treasured heart at the bottom. I am still delighted by this dish because for me it is not work to eat an artichoke, but an adventure. An artichoke prepared this way is not as rich or calorie laden as one served with melted butter or mayonnaise, yet, in my opinion, it is much more satisfying. I have made this with a couple tablespoons of grated parmesan cheese added to the egg and lemon mixture, even though the recipe doesn’t call for it, and it was very good—I love parmesan!

4 medium to large very fresh artichokes (they should be firm and not overly mottled)
2 cups good quality chicken broth (homemade is best)
1 cup cold water
3 tablespoons dry breadcrumbs
2 egg yolks           
2 to 3 tablespoons lemon juice           
3 to 4 cloves garlic, minced
¼ cup minced Italian parsley (about ¾ cup leaves)
Salt and freshly ground pepper
Olive oil to drizzle

Trim and wash artichokes thoroughly. To prevent discoloration, place them in a bowl of cold water with some lemon juice in it as you clean them. Drain the chokes and place tip side down in a pot with the broth and cold water. The pot should hold them comfortably so that the liquid reaches about half way up the chokes. Cover and bring to a boil, reduce heat and simmer 10 to 15 minutes. Turn the chokes over so that the bottoms are now submerged, cover and continue to simmer 20 to 25 minutes, or until a leaf is easily pulled from the base. Cooking time will depend on the size of the artichokes. Remove the chokes from the broth and set aside. Keep the broth simmering and add the bread crumbs. Beat the yolks with the lemon juice. Stir 2 or 3 tablespoons hot broth into the yolk mixture then add the entire mixture to the broth in the pot. Add the garlic, parsley, and season to taste with salt and pepper. Return the artichokes to the pot, bottoms down, then spoon the broth over the tops and drizzle them with olive oil. Cover and simmer another 10 minutes. Serve in soup or pasta bowls with the broth ladled over the top and plenty of good bread to soak up the juice. Serves 4.

Welcome to Mangia e Taci

Eat and Shut Up. That's what "Mangia e Taci" basically means. It was something our dad would say at the dinner table when his 7 children were all making a bit too much noise and disrupting his dinner. He wasn't mean, but had a way of getting to the point with very few words. ("Now listen!" was another phrase that worked well.)

At any rate, this blog will contain recipes from our D'Orazi Family Cookbook "Mangia e Taci" and other musings and original recipes. I hope you will enjoy reading, cooking and eating. Your feedback is always welcome.