Sunday, December 18, 2011
Meyer Lemon Almond Torte - Passed the Test!
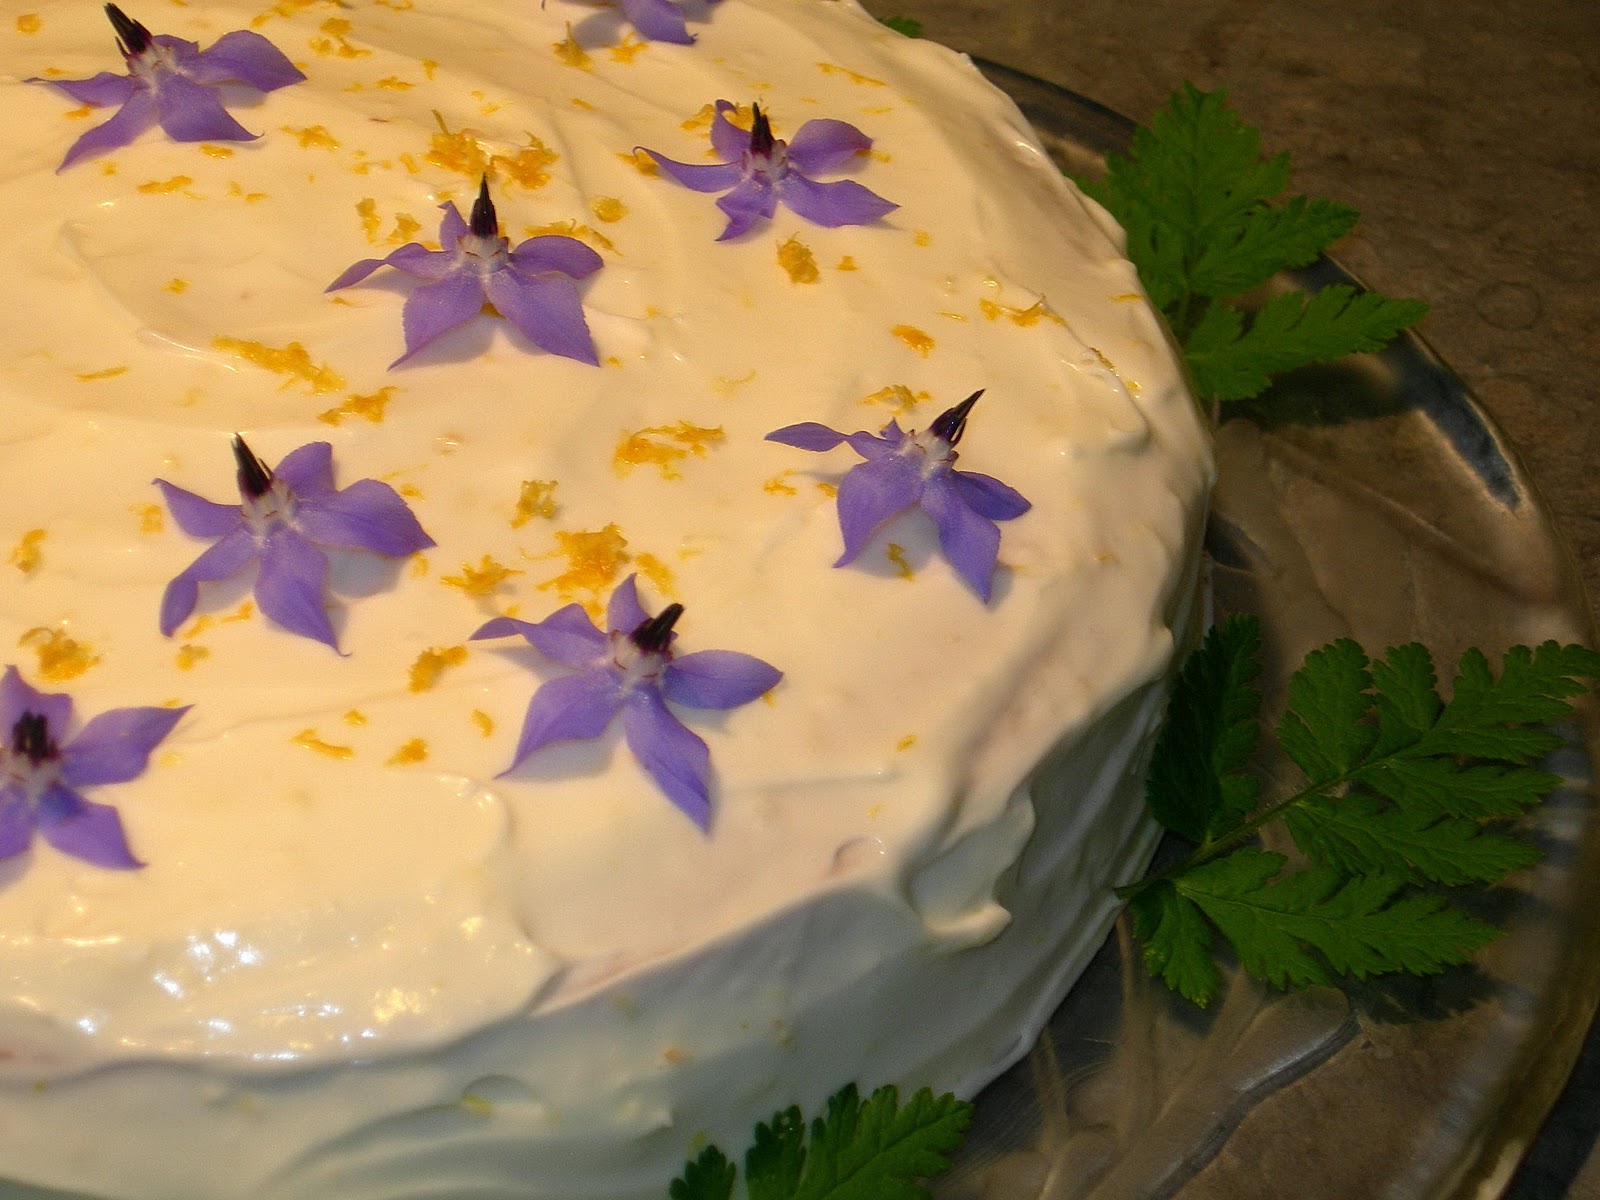
Peter, my brother-in-law, became accustomed to having dessert when my mom stayed at his home a few months back. When mom left, his sweet tooth didn't and so he was forced to make his own cake. He tried my Meyer Lemon Almond Torte which was posted back in March and took this picture. What a good looking specimen for someone who doesn't bake! I hear it was delicious too :)

Crisp, Chewy Pizza From Your Home Oven
I don't know about you, but I'm tired of friends telling me they're on a low carb diet. Boh-ring! That only makes me want to eat more bread and pasta. So here's a recipe from Peg, who makes her own pizza dough. (I'm too lazy.)

 Toppings
 That said I always use fresh mozzarella, thinly sliced and placed on paper towels to drain a bit before topping pizza and the moisture hasn’t been a problem. But in general I think it is a good idea to drain any toppings that have a lot of juice in them so that the crust will maintain its integrity during baking. I’ve included pictures of a couple favorites I’ve made—Prosciutto and Caramelized Onion; and Roasted Zucchini, Roasted Garlic, and Olive. But plain old pepperoni was also delicious. It’s fun to experiment and most any veggie you can roast and any cheese or meat you like can be used.
Pizza Dough (makes 4/10 inch or 2/18 inch pizzas)

2 cups warm water
1 tbsp yeast
1 tbsp sugar
1 tbsp olive oil (plus more for brushing if desired)
1 to 2 tsp kosher salt (depending on desired flavor)
5 cups unbleached flour, plus up to 1 cup more if needed
In bowl combine water, yeast, sugar oil and salt and let sit until foamy, about 10 minutes. By hand or using bread hook on mixer, stir in 5 cups flour and more as needed to make a soft dough—if using a mixer the dough will begin to clean the sides of the bowl. Transfer to lightly floured board and knead until smooth and not sticky (about 8 minutes if by hand). Divide into two or four equal portions depending on the size pizzas you want. At this point you can freeze some of the dough if desired. Just wrap in plastic and place in a freezer bag with label. Otherwise place balls away from each other on a well floured board or baking sheet. Sprinkle flour over the tops and cover with a kitchen towel or parchment paper and then cover with plastic wrap. Let rise until tripled; 2 or more hours depending on the temperature in your home. Using your fingers or a rolling pin if easier, stretch the dough to desired size, leaving the edge a bit thicker, and place on a sheet of parchment. Cover with a towel and let rise about 30 minutes before covering with desired toppings. During the last ½ hour to hour of this rising and preparation process, place a pizza stone on a rack in the bottom third of the oven and turn oven on to 500 degrees…this will heat up the oven and stone for a great crust. If you have a pizza peel, you can use it to transfer your completed pizza, on the parchment, to the stone (you’ll need to bake one at a time unless you have a convection oven). Otherwise, you can use a rimless baking sheet to make the transfer. If making larger size pizzas, it is easier to bake it on a pizza pan or baking sheet (with parchment underneath) until the pizza crust has firmed up at which point you can then transfer it directly to the stone to finish baking so that the crust will have the correct chew and crispness. The parchment under the dough makes the transferring much easier than just using cornmeal as in some recipes.
 Toppings
Thursday, November 24, 2011
Cranberry Orange (Tangerine) Muffins

Woke up this Thanksgiving Day realizing I had not given a thought to breakfast. Not much in the fridge, but just the right ingredients for these moist and delicious muffins. They were pretty decadent, warm out of the oven and kissed with sweet butter.
1 ½ cups all purpose flour
½ cup whole wheat flour
1 cup sugar
1 ½ teaspoons baking powder
½ teaspoon salt
½ teaspoon baking soda
2 teaspoons grated orange or tangerine rind
¾ cup orange or tangerine juice
¼ cup canola oil
2 tablespoons plain greek yogurt
1 large egg, lightly beaten
2 cups fresh cranberries, chopped roughly
⅓ cup walnuts, toasted
½ tablespoon flour
⅛ cup flax seeds
2. In a large mixing bowl, whisk together the 2 cups flour, 1 cup sugar, baking powder, salt, and baking soda. Make an indentation in the middle.
3. In a large glass measuring cup, mix orange/tangerine rind, juice, oil, yogurt and egg. Pour mixture into flour indentation and stir until everything is just combined.
4. In a small bowl, stir dried cranberries, toasted walnuts, flax seeds and remaining 1/2 tablespoon flour. Stir into batter.
5. Divide batter evenly among muffin tins. Bake 15 minutes. Remove from tins and cool on a wire rack.
Friday, October 28, 2011
Easy Pear Tart with Marsala Glaze
This is a "mash-up" recipe that combines my sister Peggy's Easy Tart recipe and a variation on poached pear recipe from David Lebovitz. It's really pretty simple. I am not a baker, and this surprised me!

Poached Pears
3-4 cups water (enough to cover the pears)
1 cup good Marsala wine
1/2 cup honey
1 cinnamon stick
3-4 pears (Bosc, Bartlett...) - peeled, cored and quartered
In a large saucepan, heat the water, marsala and honey until warm and the honey is dissolved. Add the cinnamon stick. Slide in the pears and cover with a piece of parchment paper. (This is if you want the pears to remain under the water and not have variations in color. You can skip it.) Keep the liquid at a very low boil and simmer the pears until cooked through, 15 to 25 minutes, depending on the pears.
Remove pan from heat and let the pears cool in their liquid. Once cooled, remove pears and cinnamon with a slotted spoon to a plate. Turn the heat up to med-high to reduce the poaching liquid until it has the consistency of real maple syrup. This will take about 30-45 minutes. Keep an eye on it! It will thicken a bit more once cooled.
When ready to assemble the tart, slice the pears in thin slices to place on top of the tart.
Easy Tart Recipe
1 cup flour
½ cup sugar (divided)
¼ teaspoon baking powder
⅓ cup butter
1 egg
1 cup sour cream (light works too)
1 teaspoon vanilla
3 ripe Bartlett pears
Preheat oven to 400. In a food processor combine flour, ¼ cup sugar, and baking powder. Pulse a couple times. Add butter in tablespoons and process until butter is incorporated and mixture is crumbly—it won’t form a ball. Pour into a 9 or 10 inch tart pan and gently press over the bottom and up the sides at least half way. Bake in oven for 10 minutes. Meanwhile mix egg, sour cream, remaining sugar, and vanilla. Remove crust from oven and immediately pour the sour cream mixture into the hot crust. Return to the oven until the custard is set—10 to 15 minutes. Cool and top with prepared poached pears.

1 cup flour
½ cup sugar (divided)
¼ teaspoon baking powder
⅓ cup butter
1 egg
1 cup sour cream (light works too)
1 teaspoon vanilla
3 ripe Bartlett pears
Drizzle the marsala glaze over each slice to be served. Prepare to accept compliments!
Eggplant is Delicious...Really!
Here's a post from Peg who, by the way, grows practically everything she eats!

Eggplant is one of those veggies that people seem to either love or hate. Though I’m still not a huge fan, I do like it better now that I can get it either fresh from the garden or from the farmers market. Before growing it, most of the eggplant I’d eaten was bitter or too intense with ‘eggplant flavor’. If you don’t like it, you’ll know what I mean. In spite of all the salting, draining, squeezing, a too old eggplant will never taste good in my opinion. If you can get them fresh, not too large, while the skin is still glossy and the flesh is firm, you won’t need to do anything extraordinary to prepare it for your recipe. The taste should be mild and, since it absorbs oil and flavors, an enhancement to whatever condiments are used.
I’ve included a couple recipes with Italian preparations. Eggplant is often associated with Italian cooking, but it really is very versatile and found in a multitude of cuisines. These preparations are quite easy and tasty. I like them precisely because the eggplant does not overpower any of the other ingredients.
This is not a detailed recipe as you can be very personal with it and make as much or little as you wish. Since I’m not an avid lover of eggplant, I like this dish because it is not layered and therefore the sauce and cheeses play an equally important role.

 I normally use two good sized very fresh eggplants which I slice lengthwise about ½ inch thick. I then brush both sides of the slices with olive oil and grill them on my gas grill until dark grill marks show on both sides and the slices collapse somewhat. Alternately, you can put them under the broiler until some dark spots form. Then lay them in a single layer in a baking pan and season with salt and pepper. Lay a slice of mozzarella over the top--I cover about ½ to ¾ of each eggplant slab with cheese. If you use fresh mozzarella you will get some liquid in the bottom of the baking pan when cooked, but it is quite good. Then put a spoonful or two of good thick tomato sauce over the cheese, and sprinkle parmesan all over the tops. Pop into a 350 degree oven until the cheese melts and oozes, and the dish is bubbly.
Antipasto di Melanzana (Eggplant Appetizer)
Mom and I made this recently for guests and it was a big hit. We used small, very fresh eggplants so the flavor was mild.
2 lbs fresh firm eggplants
1 lb fresh tomatoes, peeled, seeded, and chopped fine
 1 ½ tbsp minced parsley
1 ½ tbsp minced basil
1 large clove garlic, minced (or more to taste)
4 tbsp olive oil
1 tbsp capers, chopped
Juice of ½ lemon (or more to taste)
¼ tsp red chili pepper
Salt and pepper to taste
Preheat oven to 400 degrees. Roast eggplant on a baking sheet until very soft (30 to 45 minutes depending on size). Cool, peel and halve the eggplants—if seedy remove seeds. Mash eggplant and mix in remaining ingredients. Serve with crisp crackers or bread. Also good as a topping for crostini.
Monday, September 19, 2011
Basil & Vegetable Tian
Here's a wonderfully simple end-of-summer dish from Peg that's great as a main vegetarian course or as a side dish. Heck, it would be great for breakfast with a poached egg or two. And don't forget some good bread to soak up all the healthy juices...
(A tian is a layered, baked vegetable dish that originated in Provence.)

(A tian is a layered, baked vegetable dish that originated in Provence.)
Basil & Vegetable Tian
4 bunches of leafy fresh basil, stemmed and coarsely chopped
4 or more ripe tomatoes sliced ¼ inch or so
3 to 4 medium zucchini or equivalent summer squash sliced thin
2 to 3 medium potatoes sliced thin (optional)
1 ½ to 2 cups grated cheese or mix of cheeses, depending on the flavor you want
Salt and pepper
Good fruity olive oil (¼ cup or so)
Preheat oven to 375 degrees.

Oil a shallow nonreactive baking pan. If using the potatoes, place them evenly on the bottom and sprinkle with salt and pepper. Then place the zucchini slices evenly over the potatoes (or bottom of pan if potatoes not used) and sprinkle with slat and pepper. Place all of the basil over the zucchini, then arrange the tomato slices evenly over the basil and sprinkle with salt and pepper. Add the cheese evenly over the top and drizzle the entire tian with olive oil. Bake until cheese on top is a shiny golden brown and casserole is sizzling, about 45 to 50 minutes. If necessary you can brown the top under the broiler for a few minutes.
Tuesday, August 9, 2011
Pane Italiana (Italian Bread)
I made this special bread on Sunday to go with homemade lasagna al forno. Both recipes are in the Mangia e Taci cookbook, available through www.lulu.com. The bread is very simple, although making the shapes takes a little know-how. Here you see roses, pumpkins, and crescent rolls, before and after.


Monday, August 8, 2011
Savory Roasted Herbed Chicken
Something new from Peg's kitchen. Simple, elegant and delicious!
This is a dish that was first served to me by my dear friend Lori. She is an amazing cook, and I believe she adapted it from another recipe, but not sure whose. It is similar in ingredients to the roasted chicken recipe in Mangia e Taci, but the prep and results are different and yummy. I made it for my mom when she was visiting last summer and she has since asked me for the recipe. It is simple and quick to prepare so no excuse not to try it. Just be sure to have plenty of good bread on hand to soak up all the juice because it is incredibly tasty.
One large chicken cut into serving sized pieces (I often just buy the separate parts that I like—breasts, legs, thighs, or what ever—leave the skin on!)
Olive oil
Garlic (as much as you like, leave the cloves whole and unpeeled; I use at least a dozen cloves)
1-2 lemons
White wine (about ¾ cup)
Fresh herbs (the original recipe calls for a large handful of fresh basil leaves, but I have also used lesser amounts of fresh rosemary and thyme when basil is not in season)
Salt and pepper

Preheat the oven to 400-425 degrees (depending on your oven).
Season the chicken all over with salt and pepper and place in a single layer in a non-reactive roasting pan. Drizzle enough olive oil over the chicken pieces to moisten them and make a shallow pool in the bottom of the pan. Lightly squash the garlic in its skin and tuck the cloves all around the chicken. Squeeze the juice from the lemons over the chicken and drop the lemon shells in the pan too. Place in oven and roast for about 45 minutes. Remove from the oven tear up the basil leaves, scatter over the top, mixing a bit, and pour the wine over. Return to the oven for another 15 minutes or until the chicken skin is nicely browned and crisp. Serve in large bowls with the pan juices spooned over the top. The roasted garlic can be easily squeezed from their peels to enjoy along with the chicken.
Saturday, July 30, 2011
Seasoned Kale Encrusted Baked Salmon
I made this for dinner tonight. It was incredibly moist and tasty. I bought the kale sprinkles at the Kaiser Farmer's Market. They are made by a local producer named Kaia Foods. It was a delicious and healthy complement to the fish. So easy!

2 large salmon fillets
2 tablespoons mayonnaise
1 clove garlic, minced
⅓ cup seasoned kale crumbs (Kaia Foods Habanero Ranch Sprinkles)
pinch sea salt


Mix the garlic with the mayo and let sit about 5-10 minutes to blend flavors. Spread over the salmon filets. Press kale sprinkles over the mayo spread. Bake at 350º for 15 minutes. Sprinkle with a pinch of salt, depending on the amount of salt in the sprinkles.
Saturday, July 23, 2011
The Best Potato and Green Bean Salad - Italian-style
Here's another post from Peg...
 ¼ cup chopped Italian parsley
Variation on the Green Bean theme:
Insalata di Patate e Fagiolini
Potato and Green Bean Salad
This is the potato salad we ate as children, and it’s still my favorite. Of course as with any vegetable dish it will be as good as the ingredients used, so use the freshest green beans. It makes a nice change of pace from American style potato salad that is loaded with mayonnaise (and calories!) and is a perfect accompaniment to meat or fish served from the grill in summer when the beans are in season.
4 medium waxy potatoes (about 2 lbs), boiled until tender, cooled, peeled, and cut into 1 inch cubes
½ lb young green beans, steamed until just tender, cooled, and cut into 2 inch lengths if too long (if you can find the small French beans, haricot vert, they are delicious and don’t need to be cut)
1 large clove garlic, minced, or more to taste
 ¼ cup chopped Italian parsley
¼ cup olive oil
2 tablespoons white wine vinegar, or more to taste
Salt and fresh ground pepper
Mix all ingredients and adjust seasoning as needed. Serves 4 to 6.
(Note from Mary: I particularly like this salad at room temp or slightly warm from the potatoes not having cooled completely. The warmth allows the flavors to blend and the texture to be slightly creamy.)
Variation on the Green Bean theme:
Insalata Di Fagiolini Freschi
Fresh Green bean Salad
This is a quick simple and low calorie salad to make when you find an abundance of fresh good quality beans in season.
1 lb fresh green beans, steamed until tender and cooled
1 tablespoon Dijon mustard
1 tablespoon olive oil
1 tablespoon balsamic vinegar
Salt and fresh ground pepper
Beat the mustard, oil, and vinegar together, season to taste with salt and pepper; pour over the cooked, cooled beans and adjust seasonings as needed. Serves 6.
Sunday, June 12, 2011
Really Good Gluten Free Blueberry Banana Cake

Streusel Topping
6-7 tablespoons unsalted butter
1 cup gluten-free all purpose flour
½ cup sugar
½ teaspoon ground cinnamon
¼ teaspoon baking powder
¼ teaspoon salt
3 tablespoons walnuts or pecans, finely chopped
Note: This makes quite a bit of topping. I used some of it. The rest will keep in the fridge indefinitely.
¾ cup gluten-free all purpose flour
½ teaspoon baking powder
½ teaspoon salt
¼ teaspoon baking soda
⅔ cup butter, room temp (or 7 T canola oil)
2 teaspoons lemon zest (opt)
½ cup brown sugar
1 large egg
1 teaspoon vanilla
½ cup buttermilk, (or milk with 1 T lemon juice)
2 ripe bananas
¾ cup fresh blueberries (opt)
¾ cup walnut pieces (opt)
Prepare a recipe of Streusel Topping and set aside.
Heat oven to 350º. Grease cake pan, loaf pan or line muffin tins with cupcake liners.
In a large bowl, thoroughly whisk the dry ingredients together. Set aside.
In another large bowl, cream together butter & optional lemon zest. Add sugar, blend, followed by the egg and vanilla. Reduce mixer speed and add flour mixture, alternately with buttermilk, starting & ending with the flour (3 flour, 2 buttermilk additions). Mix just until blended after each addition. Blend in mashed banana. Fold in blueberries.
 (Note: I used oil instead of butter and didn't really need to use a mixer. A whisk and a spoon worked fine.)
Pour the batter into a 9x9 cake pan. Top with streusel mixture, completely covering the tops. Press gently to adhere.
Bake for 25-30 minutes or until the topping is golden brown. Remove from oven and place on a rack to cool.
To make a loaf instead, put in a loaf pan and bake at 325º for about 45 min to 1 hour. Or for muffins pour batter into muffin tin and bakeat 375º for about 25 minutes. Test middle for doneness before removing.
Cake
1 cup almond meal¾ cup gluten-free all purpose flour
½ teaspoon baking powder
½ teaspoon salt
¼ teaspoon baking soda
⅔ cup butter, room temp (or 7 T canola oil)
2 teaspoons lemon zest (opt)
½ cup brown sugar
1 large egg
1 teaspoon vanilla
½ cup buttermilk, (or milk with 1 T lemon juice)
2 ripe bananas
¾ cup fresh blueberries (opt)
¾ cup walnut pieces (opt)
Heat oven to 350º. Grease cake pan, loaf pan or line muffin tins with cupcake liners.
In a large bowl, thoroughly whisk the dry ingredients together. Set aside.
In another large bowl, cream together butter & optional lemon zest. Add sugar, blend, followed by the egg and vanilla. Reduce mixer speed and add flour mixture, alternately with buttermilk, starting & ending with the flour (3 flour, 2 buttermilk additions). Mix just until blended after each addition. Blend in mashed banana. Fold in blueberries.
 (Note: I used oil instead of butter and didn't really need to use a mixer. A whisk and a spoon worked fine.)
Pour the batter into a 9x9 cake pan. Top with streusel mixture, completely covering the tops. Press gently to adhere.
Bake for 25-30 minutes or until the topping is golden brown. Remove from oven and place on a rack to cool.
To make a loaf instead, put in a loaf pan and bake at 325º for about 45 min to 1 hour. Or for muffins pour batter into muffin tin and bakeat 375º for about 25 minutes. Test middle for doneness before removing.
Saturday, May 28, 2011
Fresh Pea Soup with Butter Dumplings
Anyone out there have fresh peas growing in the garden? I've never grown them myself, but my sister Peggy does. She's the farmer in our family and at one time ran an organic herb farm. Now she gets to enjoy the fruits (and vegetables) of her labor. Here's another delicious recipe from Peg.
Fresh Peas
Every year around Valentines Day I plant peas in my garden—I prefer English peas. These are the type that need to be shelled, which may be why they are more difficult to find in the produce departments. It’s a lot easier to buy them frozen, I suppose, but I actually enjoy the process of splitting the shell and spilling the sweet little green orbs into a bowl. A few always find their way into my mouth as well and they are so sweet almost like a healthy candy—my grandsons will attest to that. They also get a thrill out of picking the pods and retrieving the hidden treasures.
It’s quite a process getting a pea from seed to pod. It takes time and patience and finally the effort of preparing them for the table. But to me the whole process is exciting (I know, get a life, right!) and so rewarding that the end result is worth the endeavor. One of my favorite ways to prepare fresh shelled peas is a soup base that I generally freeze. The warm temperatures when the peas are harvested don’t usually invite a hot soup, but if we do have a cool summer day I don’t hesitate to go all the way with the recipe. Of course you could use frozen peas with good results I’m sure. The resulting soup is very different from split pea, much fresher tasting, and oh those dumplings—yummy and comforting!
I’ve adapted this recipe from The Vegetarian Epicure by Anna Thomas.
Fresh Pea Soup with Butter Dumplings (serves 6)
Soup:
4 cups shelled peas (approximately 4lbs unshelled)
4 ½ cups vegetable or chicken stock
1 tsp sugar, optional (if peas have good sweet flavor omit)

½ medium onion diced
½ cup white wine (Rhine or dry depending on your preference)
Salt and fresh ground pepper to taste
4 ½ tbsp butter
4 ½ tbsp flour
Dumplings:
6 tbsp softened unsalted butter
2 eggs, room temperature
½ cup flour
¼ tsp nutmeg
2 to 4 tbsp chopped fresh herbs (chive, tarragon, or chervil work well)
¼ to ½ tsp salt
Soup: Cook the peas and onions in the stock until quite soft. Blend until well pureed and season the thin puree with wine, salt, and pepper. Melt the butter in a soup pan and stir in the flour. Cook the roux over low heat for a few minutes then stir in the puree a cup at a time whisking after each addition until smooth. Return to heat and bring to a gentle boil to prepare for the dumplings.
Dumplings: Soften the butter as much as possible, but do not melt. Beat the eggs with the flour and beat in the butter. Season with nutmeg and salt and stir in the herbs. Drop the batter by half teaspoons into the gently boiling soup. When they rise to the top they will need about 5 more minutes to cook through.
Saturday, May 14, 2011
Brown Chewies - A Childhood Favorite

Brown Chewies
1 cup brown sugar
1 egg
5 T flour
1 pinch baking soda
1 t vanilla
1/2 cup walnut pieces
1-2 T melted butter or margarine
Mix first four ingredients until combined. Fold in nuts. Spread over melted butter (or margarine) in an 8x9 cake pan. Cook 12-15 minutes at 375º to 400º. Cool and cut into small squares.
Thursday, April 28, 2011
Gianduiotto - Italian Chocolate Pudding from "Mangia e Taci"
Here's another recipe from our family cookbook Mangia e Taci, available at www.lulu.com. (fyi...We make no money off of this book; it was done mainly for family and friends to share.) Aside from favorite recipes from my mom's kitchen, the book includes a bit of family history, dad's musical recipes and some stories written by all of us D'Orazi children. I chose to post this recipe for Gianduiotto (pronounced jan-doo-YOHT-oh) because my birthday is tomorrow. Hint, hint!
Gianduiotto
Italian Chocolate Pudding
This is a dessert that is not as sweet as most American puddings, but is almost as easy to make. Once again it can be surrounded by liqueurs to heighten the flavor and create a more intriguing presentation for company.
 |
| Happy Birthday to me... |
½ cup unsalted butter
½ cup sugar
½ cup unbleached flour
½ cup sweet chocolate powder
3 tablespoon unsweetened cocoa powder
5 cups milk (preferably whole, but 2 percent works), heated
Amaretti cookies, crumbled (optional)
2 to 3 tablespoon sweet vermouth (optional)
Melt butter in a medium saucepan over medium to medium low heat. Add sugar, flour, chocolate, and cocoa and cook stirring constantly for 5 minutes—the mixture will be thick and paste like. Add the hot milk a little at a time, incorporating it after each addition. Simmer the mixture over medium low heat for about 15 to 20 minutes, stirring frequently to avoid scorching. The mixture will be very thick, but still pour able. Moisten the cookie crumbs with the vermouth, if used, and spread in the bottom of a shallow serving bowl or casserole dish. Pour the pudding mixture over the crumbs, cool, cover, and refrigerate overnight. The pudding will set up and form a thin skin over the top. Serve with whipped cream if desired. Serves 6 to 8.
Joanne’s comment: This pudding was outstanding and easy to make! Instead of chilling it over night, I made it in the morning, chilled it for 8 hours and we had it for dessert that evening. We couldn’t wait!
Peg's Savory Tart with Greens
Here is the tart I was inspired to make after enjoying Charlene’s Hortopita. I am a sucker for most any savory pastry though I rarely take the time to make them. I decided to try an olive oil pastry crust as I thought it would work well with the ingredients I had for the filling, but a butter pastry would work also. In fact, the olive oil pastry I tried was a pain to get into the tart pan—the flavor and texture however were very good. I just used ingredients I had available which included a fair amount of different greens, but no dandelions. So you can be creative and change it up to suit your own taste or availability.
Pastry:
1 ¼ cups unbleached flour
½ tsp kosher salt
¼ tsp baking powder
1/3 cup olive oil
2 tbsp ice water (or a bit more if needed)
Stir dry ingredients together and add the olive oil in a steady stream until incorporated. Add the water a tbsp at a time until the dough comes together. Flatten into a disk and press into a 9 or 10 inch tart pan. This took a bit of effort on my part—I may have just needed to add more water, but didn’t want a tough crust.
Filling:
1 slice bacon, diced
1 tbsp olive oil
 2 cloves garlic, minced
1 tsp each fresh rosemary and thyme, minced
1 tbsp Italian parsley, minced
½ fennel bulb, diced
6 or more cups thinly sliced greens (kale, chard, spinach, mustard, endive, dandelions, whatever)
¾ cups cooked beans, optional (I had some cooked cranberry beans, mushrooms would also be good)
1 tbsp cilantro, chopped
2 eggs
1 cup milk
Cheese of your choice (I used about 2 oz. of taleggio and a couple tbsp parmesan)

Kalamata olives, pitted and halved, optional
Sauté bacon in olive oil until cooked; add garlic, herbs and parsley and sauté another minute or so, then add the fennel, season with salt and pepper and cook until tender. Add the sliced greens and beans if used, season again with salt and pepper adding some cayenne, if you like, to taste. The filling should be well seasoned so that you don’t need to season the egg mixture. Cool slightly and pour into prepared tart shell. Sprinkle with the cheese of your choice. Beat milk and eggs together and pour evenly over the filling. Decorate with olive halves if desired. Bake at 350 to 375 degrees until set, and top is beginning to brown about 30 minutes.
Sunday, April 17, 2011
Hortopita with Dandelion Greens
The following is another contribution from Peg about a lovely meal she recently had with friends. Wish my friends were as "foodie" as hers! The recipe is not Italian, but from a Mediterranean neighbor...

Afternoon Delight
Peter and I recently had the pleasure of joining our neighbor Lars and some friends from the other side of the Willamette Valley (we live on the east they on the west) for a tour of his vineyard and farm. We started the tour in his wine cellar (which Peter calls ‘the bunker’ because it is a small concrete fortress bermed into the side of a hill). A visit to Lars’ cellar always means a tasting of the developing wines from his barrels. It was a perfect warm up and lightened my spirit enough to be agreeable about braving the wet and chilly afternoon. We continued the tour with a nod to the sheep and chickens and a discussion of his very organized composting system. Since we were all gardeners, it was a relevant topic and exciting to see the beautiful black moist soil that resulted from his efforts.
Finally when the rain began in earnest, we retreated to the house to enjoy our potluck lunch. Now you know you are mingling with foodie greatness when there is nothing ordinary set out on the communal table. Here is a run down of what we enjoyed that afternoon: Homemade Swedish rye bread and farm fresh egg salad with capers; Hortopita, which is a Greek phyllo and dandelion savory pastry; homemade salami (yes, really!) and homemade cheese; homemade hummus; fennel chutney; a big mixed salad; and a trio of homemade cookies—all washed down by various wines and a delicious nettle tea.
I asked Lars to share his bread recipe as it was so dense, moist and tasty. But since he is Swedish and works from the metric system, I had to adjust the recipe to our American standard system. So, before sharing it, I will try it out and fine tune it if needed.
I also asked my friend Charlene to share her recipe for the Hortopita which was amazing not only because it was delectable, but also because she gathered the 3 pounds of wild dandelions to make it with! Try to imagine what a mound of greens that is, and if you’ve ever even tried to dig those tenacious weeds out of your garden or lawn, you will appreciate the amazing effort it would take to gather and clean that volume.
The Hortopita is similar to the northern Italian Torta Verde (green tart) in that it has a filling of greens, but rather than phyllo, the pastry surrounding it is more of a buttery pie crust. Based on the ingredients, Charlene’s version is really quite healthy and I hope to try it soon, though honestly I will have to substitute something for the dandelions—I’m not that ambitious! I was inspired enough to try my own savory pastry using ingredients I had on hand, so I will share that recipe as well since it was a success.
Charlene's Hortopita
3 lbs blanched and wrung out dandelion greens, chopped
3 leeks and 3 shallots sautéed in olive oil till beginning to caramelize
Can add chopped parsley, dill, I had some dried dill
After the above has cooled, add:
Juice of 2 lemons
Salt & Pepper
1 lb cubed feta
2 eggs (I used one duck egg, one chicken egg)
Pinch cayenne
Pinch nutmeg
Layer in phyllo dough (I used the organic spelt phyllo), using about one half cup olive oil to brush on between the layers. I put on the bottom 3 or 4 sheets, then a glob of the horta, spread to edge, then 3 or 4 sheets phyllo, one more glob horta, spread to the edge, then top with 3-4 sheets, fold over edges, crimp and brush with olive oil.
Bake 400 for one hour, until browned on top.
The amount in this recipe would be enough for a big lasagne pan, or full sized cookie sheet. I had some of the horta left over from the smaller deep dish pizza dish I used.
Tuesday, April 5, 2011
Spaghetti and Meatballs - An Italian-American Classic
Here is the recipe from Peg as promised.
Spaghetti and meatballs is considered a classic Italian dish by many Americans. However the meatballs (polpette) we ate in our Italian family never included spaghetti or any kind of pasta, and certainly never any tomato sauce. In fact Italian Americans at the turn of the century were not serving meatballs with their spaghetti. But the American hankering for meat required Italian restaurants to accommodate that craving—thus was born spaghetti and meatballs, a creation of east coast Italian Americans.
The first time I ever ate spaghetti and meatballs was at the home of my future in-laws when I was in my twenties. It was a favorite meal in my husband’s family, but sadly when his mother passed away her meatball recipe was lost with her. I have never had a great desire to make the dish, but since my husband had such fond memories of it I decided to give it a try. I looked at several meatball recipes and adapted them to include ingredients I had on hand, and thought would work. I had some grass fed ground beef and pork from my local farmers market so I was off to a good start. Happily it was a success so I will share it.

Italian American Meatballs
½ onion finely diced
3 cloves garlic minced
2 tsp chopped fresh thyme
2 tbsp chopped cilantro
2 tbsp chopped Italian parsley
1 lb lean ground beef
1 lb ground pork
¾ cup fresh whole wheat or white bread crumbs
1/3 cup dry bread crumbs
½ cup grated parmesan cheese
¼ cup grated Romano cheese
¼ tsp nutmeg
2 tsp kosher or sea salt
½ tsp black pepper (can use red if you want spicier)
1 large egg, beaten
¾ cup water
Sauté the onion in about 2 tbsp olive oil over medium heat until golden; add the garlic and herbs and sauté another minute or two; cool. Combine with the remaining ingredients in a large bowl and mix gently with a fork until well mixed but loose. Use your hands to lightly form the mixture into about 24 golf ball sized meatballs—don’t over work the mixture or the meatballs will be tough. Pour enough oil (I used a combination of olive and grapeseed) to cover the bottom of a large non stick skillet. Heat the oil over medium heat until hot then brown the meatballs on all sides in batches if necessary, lowering the heat as needed, and drain on paper towels. They will finish cooking in the sauce. Retain the pan drippings for the sauce.
Tomato Sauce
I had some frozen homemade tomato sauce, but you can use any good quality tomato or marinara sauce as follows:
1 chopped onion
3 large cloves minced garlic
¾ cup red wine
4 cups tomato sauce (or you can puree whole canned tomatoes in a processor)
1 tbsp chopped Italian parsley
1 tbsp chopped fresh basil
Salt and pepper to taste
Sauté the onion in the pan drippings until tender and translucent, add garlic and sauté 2 more minutes; add the wine and cook over medium high to deglaze the pan until most of it has evaporated. Add the tomato sauce, herbs and season to taste. Cover and simmer five or ten minutes to heat thoroughly, then add the meatballs to the sauce and simmer gently for about 30 minutes. Serve with cooked pasta of your choice.
Note: You can freeze some of the meatballs prior to cooking in the sauce if all 24 are not needed. If you do all 24 you might make another ½ recipe of sauce if you like more sauce with your pasta.
Monday, March 28, 2011
Polpette- A Different Sort of Meatball
Personally, I've never liked the term "meatball." It just doesn't sound appealing to me. However, the italian word "polpette" is much more delicate, just like this version of not-your-usual-ball-of-meat. (See what I mean?) These aren't meant to be mixed in with spaghetti because they are a stand alone delicacy. I'll be posting a more traditional spaghetti & meatball recipe soon!
From Mangia e Taci, The D'Orazi Family Cookbook. Forward by Peggy.
 Put the beef in the food processor with the onion, garlic, and herbs and process until finely chopped—do not over process. Remove to a large bowl. Place the other ½ lb meat in the processor with the potato and soaked bread and process until finely chopped. Add to the beef mixture and stir in the cheese. Season with salt and pepper to taste, and stir in the egg. The mixture should not be too wet at this point and should hold together easily. You can add dry bread crumbs if it seems too wet, or a little milk or broth if it seems too dry. Make golf sized balls and flatten slightly. Heat about ½ inch oil in a heavy bottom skillet over medium heat. Dredge the polpette in flour and fry in batches until brown on all sides, adding oil as needed, and adjusting heat as needed. Drain on paper towels. Makes 15 to 20.
From Mangia e Taci, The D'Orazi Family Cookbook. Forward by Peggy.
While visiting my parents during the preparation of this book, I asked my Mother how to make the polpette she used to make when we were children. I remember how I loved them as they were unlike any meatball I’d ever had—most of which seem like mini round burgers in a sauce. It was a mystery to me how she achieved that tender savory interior and the slightly crusty exterior, and they were never served in a sauce. She told me that they were made from leftover meat, especially Bollito, but that any leftover meat and cooked vegetables could be used. I’d been visiting for a few days, so we had some leftover steak, a chicken breast in mushroom sauce, and a baked potato, so she agreed to prepare some polpette so that I could document the procedure. She used to use a meat grinder to prepare these, but now swears by the food processor. Trust me, it’s a unique and delicious way to create a totally new meal out of leftovers that might otherwise never get eaten. You need to use your judgment a bit regarding the ingredients you use—if it seems as though they would work together in the same meal, they will probably make good polpette.
½ lb leftover cooked beef (steak, roast, boiled, etc., or you can use some fresh ground if needed)
½ small onion
2 large cloves garlic
½ cup Italian parsley leaves
1 teaspoon fresh chopped oregano or ¼ teaspoon dried
½ lb other cooked leftover meat (chicken, turkey, pork, lamb, ham, etc.); it’s fine even if there is sauce or vegetables with the meat
1 medium cooked potato or equivalent amount of leftover rice
2 slices bread soaked in ¼ to ½ cup milk or broth
2 ounces cheese, grated (preferably parmesan, but cheddar, Swiss, or most any hard cheese will do)
Salt and pepper
1 egg, beaten
Flour as needed
Oil for frying (canola, peanut, etc)
 Put the beef in the food processor with the onion, garlic, and herbs and process until finely chopped—do not over process. Remove to a large bowl. Place the other ½ lb meat in the processor with the potato and soaked bread and process until finely chopped. Add to the beef mixture and stir in the cheese. Season with salt and pepper to taste, and stir in the egg. The mixture should not be too wet at this point and should hold together easily. You can add dry bread crumbs if it seems too wet, or a little milk or broth if it seems too dry. Make golf sized balls and flatten slightly. Heat about ½ inch oil in a heavy bottom skillet over medium heat. Dredge the polpette in flour and fry in batches until brown on all sides, adding oil as needed, and adjusting heat as needed. Drain on paper towels. Makes 15 to 20.
Mary’s comment: I’ve made polpette many times and each time a different way—it depends on what leftovers you have. I’ve used leftover pork loin and lunch meats (vs. beef), and leftover rice instead of potatoes. If the leftover meat has garlic in it, I use that garlic and don’t add any more. If the leftovers already have herbs, I don’t add any oregano or parsley. I’ve done it without adding the milk soaked bread and used bread crumbs. Funny thing is, no matter what goes into them, they always seem to taste the same—delizioso! One more thing…don’t forget the ketchup for dipping! Or serve them with the stuffed baked tomatoes in this book and you can forget about the ketchup.
Tuesday, March 22, 2011
Gabe's Cake - As delicious as it is beautiful!
Peggy did make use of the candied orange peel from a few posts ago. Lots of work, apparently, but what a beautiful work of art. I only wish she didn't live all the way in Portland. She always was a tease!

Well, I did use some of my candied orange peel to make the cake I talked about. I’ve decided to call it Gabe’s Cake after my son because I am impressed that he made it as a teenager with practically no baking experience. And, I, who’ve had years of experience found it a trying process. The result was delectable, however, so I will share the recipe which was adapted from Saveur magazine.
The Sponge Cake:
14 tbsp all purpose flour, sifted
4 eggs
1 egg white
½ cup plus 2 tbsp sugar
1 tsp vanilla
¼ tsp cream of tartar
Preheat the oven to 425. Butter an 8” spring form or 9” round cake pan and line the bottom with buttered parchment paper. Sift flour twice and set aside. Put 1 whole egg and 3 yolks in mixing bowl (a standing mixer is best due to mix time); reserve whites in a separate bowl along with additional white. Add sugar and vanilla to yolks and beat at medium speed until pale and fluffy (up to 8 minutes); set aside. Beat whites on medium low speed about 2 minutes or until frothy; add cream of tartar, increase speed to medium high and beat until stiff peaks form; 2 to 3 minutes. Using a rubber spatula, carefully fold 1/3 of the whites into the yolk mixture, and then fold in the remaining whites. Sift about ¼ of the flour into the egg mixture and gently fold it in. Continue to sift and fold ¼ of the flour at a time until all the flour is incorporated. Pour into a prepared pan and place in the oven. Lower the heat to 325 and bake until golden—about 30 minutes. Cool in the pan for 5 minutes then unmold, peel off parchment and cool on rack.
The Ricotta Filling:
2 ½ cups ricotta
6 tbsp confectioner’s sugar
¼ tsp cinnamon
½ cup chopped candied orange peel
1 ½ oz chopped semi sweet chocolate
Put ricotta, sugar, and cinnamon in a food processor and puree until smooth. Transfer to a bowl and refrigerate at least 2 hours. Fold in orange peel and chocolate and return to frig.
The Ganache/Frosting:
1 cup heavy cream
3 ½ oz chopped milk chocolate
5 oz chopped semi sweet chocolate
Heat cream in saucepan and bring to boil over medium heat. Remove from heat, add chocolates, let sit 1 minute, then whisk until smooth and set aside to cool. Set in frig until thick enough to frost without dripping.
Assembly:
Cut cake into two layers. Place bottom layer on cake plate and spread on ½ of the filling. Place the 2nd layer on the filling and frost the sides and up over the top about 1” with the ganache. Spread the remaining filling over the top. Sprinkle the edges with chopped toasted almonds or hazelnuts if desired and decorate the top with shave chocolate and additional candied orange peel.
Sunday, March 20, 2011
Another Rainy Day Option - Minestra di Ceci (Garbanzo Bean Soup)
Another post from the family cookbook, Mangia e Taci. The comment at the end is from my niece Olivia. Intro by Peggy...
This is a soup I remember eating very often on Christmas Eve at the home of my father’s sister, Auntie Rosy. She was a woman ahead of her times, having made her own way in the world as a college professor of languages. Like my Dad, she was born in Montana and then moved back to Italy when she was in her early teens. She completed her education there, retained her perfect English, and returned to the states to pursue her career shortly after WWII. She was like a second mother to us, babysitting when my parents were away. She was always full of life, and a great conversationalist. I remember staying with her at her home in Oakland, CA where the wisteria bloomed down the banister. I’d be awakened by the singing of her canary and her cheerful attitude. Even as children, she treated us with respect as well as loving kindness. She never had children of her own (perhaps because her brother had enough to share!), and in fact did not marry until she was 60. Now, approaching 100 (102 now!), and having recently lost her husband who was over 100, she continues to inspire me. Perhaps the longevity is a testament to all the flavorful Italian meals. This soup was certainly a highlight of our holiday traditions. We would smell it as we walked in the door of Auntie Rosy’s home, redolent of rosemary, garlic, and the big parmesan rind she threw in the pot for added flavor. I no longer wait until Christmas Eve to enjoy this soup, as it is a comforting cold weather treat. Join it with a tossed salad and some good bread for a simple but hearty meal.
2 tablespoons olive oil
2 cans (15 oz.) or 3 cups cooked, dry garbanzo beans/chickpeas, drained
1 small onion chopped
4 cloves garlic, minced
1 tablespoon fresh rosemary, chopped, or 1 teaspoon dry
1 lb. fresh tomatoes, peeled and chopped, or 1can (28 oz.) plum tomatoes wit juice, chopped
8 cups chicken broth
½ Savoy cabbage, chopped
1 cup small pasta (preferably egg pasta, such as quadrattini)
Salt and freshly ground pepper to taste
Parmesan rind (optional)
In a large soup pot sauté the onion in olive oil over medium heat, until translucent. Add the garlic and rosemary and continue to sauté for two more minutes. Add the tomatoes, broth, chick peas, cabbage, and parmesan rind if available. Bring to boil then reduce heat to low. Season with salt and pepper to taste and simmer until the cabbage is tender (15 to 20 minutes). Before serving add pasta and cook until tender (about 15 minutes). Serve with grated parmesan cheese. Serves 6 to 8.
Olivia’s comment: “Mom this soup is sooo delicious and I don’t even like soup!”
Saturday, March 19, 2011
Onion Soup on a cold rainy day
This is one of my mom's quick and delicious soups. I made it tonight and it was just the thing for a cold evening! It's very easy and so tasty. It's a take on the French version, I suppose. I forgot to take a picture of the finished product, but suffice it to say it looks like broth with onions in it! When you add the bread and melt the cheese on top, it's irresistible! If you try it, let me know what you think.
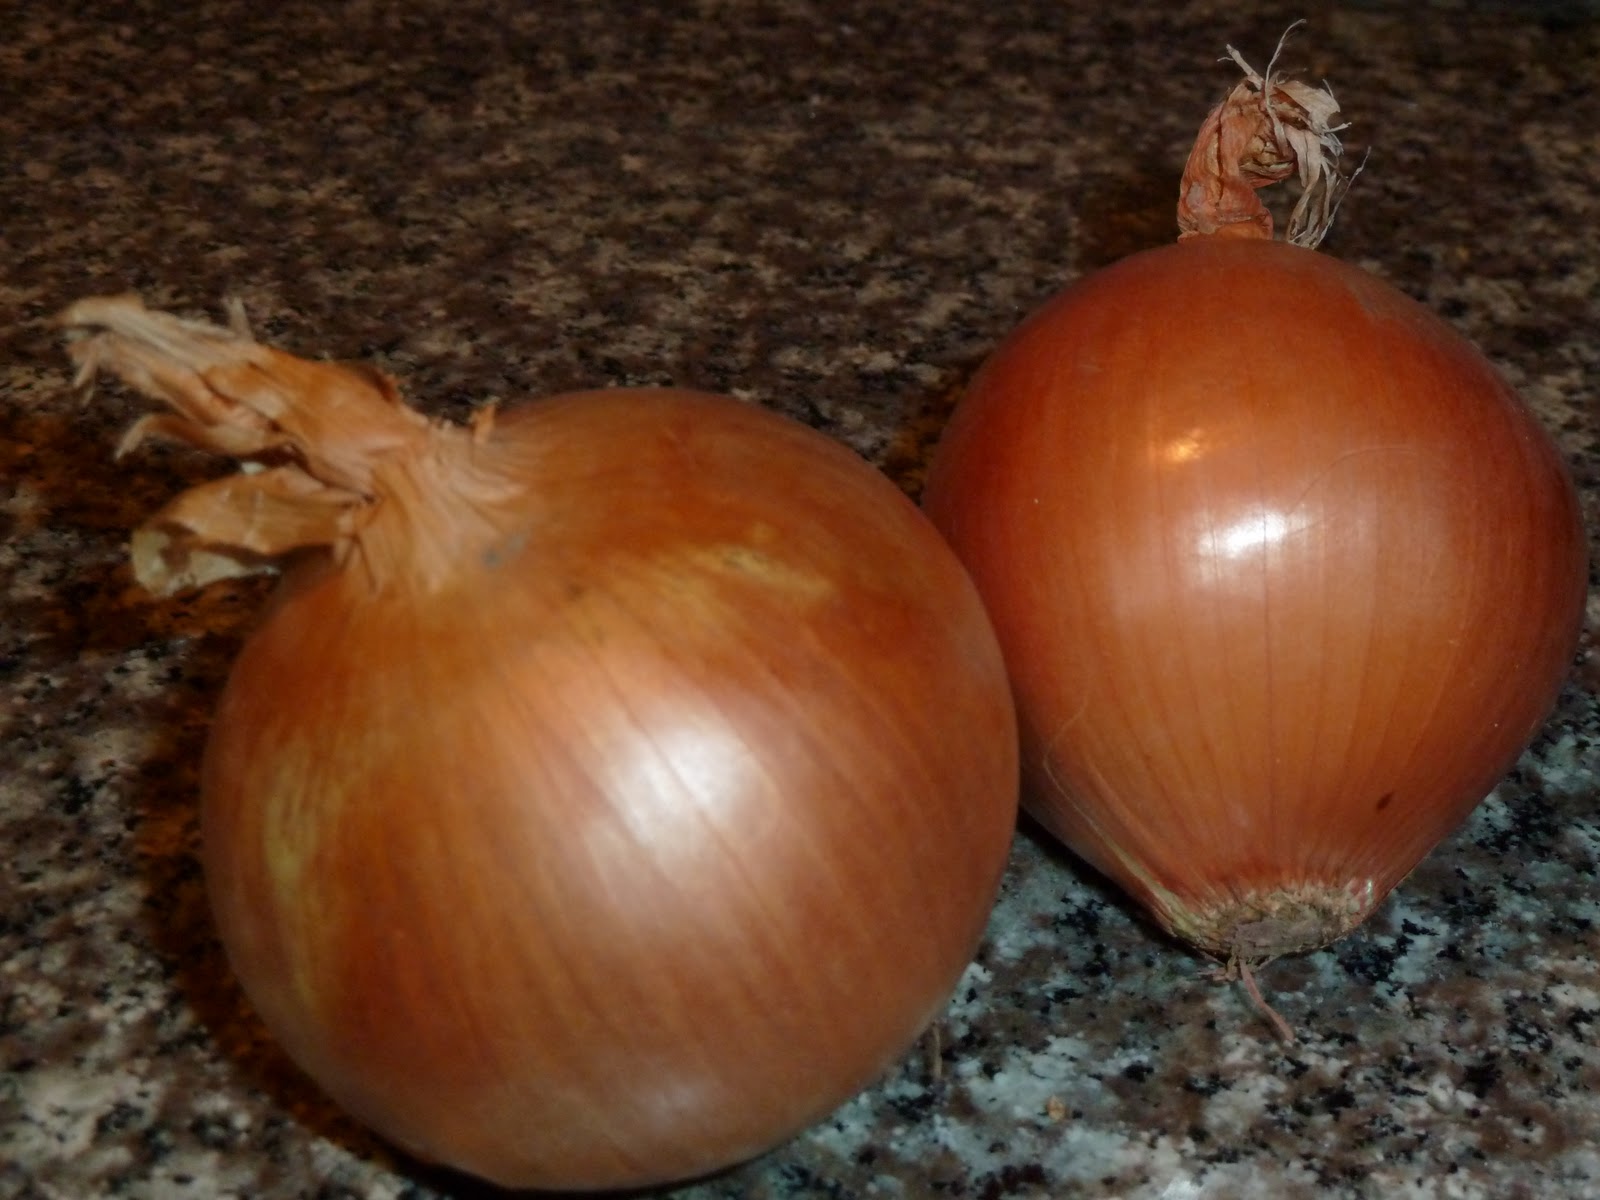
 2 large yellow onions, sliced thinly
32 ounces chicken broth
1 cup white wine, sauvignon blanc (not pinot gris)
2 tablespoon butter
2 tablespoon olive oil
salt & pepper to taste
gruyere cheese, grated for top
thick slices of pugliese or other dense bread, thickly sliced and toasted (one per bowl)
Melt butter with olive oil in stock pot. Add onions and saute over med-low heat, stirring occasionally, for about 20-25 minutes to caramelize. Onions should be soft and have a creamy texture. Add S&P to taste and mix. Add wine and broth Cover and simmer 5-10 minutes. Meanwhile toast the pugliese slices. Grate some gruyere (I use about 1/4 cup per bowl)
Put some soup in a bowl, top with bread slice and some more broth. Top with grated gruyere cheese and put in microwave on high for about a minute to melt the cheese or under a broiler.
Sprinkle top with parmesan.
32 ounces chicken broth
1 cup white wine, sauvignon blanc (not pinot gris)
2 tablespoon butter
2 tablespoon olive oil
salt & pepper to taste
gruyere cheese, grated for top
thick slices of pugliese or other dense bread, thickly sliced and toasted (one per bowl)
Put some soup in a bowl, top with bread slice and some more broth. Top with grated gruyere cheese and put in microwave on high for about a minute to melt the cheese or under a broiler.
Sprinkle top with parmesan.
Makes about 4 servings.
Sunday, March 13, 2011
Homemade Candied Orange Peel Isn't Just for Fruitcakes!
Here's another recipe from Peggy, with a sweet tease at the end...
To my mind, no food brightens an overcast climate as much as citrus. Whether it be a juicy grapefruit for breakfast or a squeeze of lemon or lime over a salad, the vivid acidity lets some light into an otherwise dark day. Of course beyond the juice, citrus fruits also have their peel to thank for adding ‘zest’ to a variety of dishes. A grating of it into a sauce, or a slip added to a drink can make the ordinary seem special.
I’m going to make a birthday cake for a friend, and I’ve been thinking about a cake that my son made me for my birthday about 20 years ago that I have never forgotten. It was a recipe in my newest issue of Saveur magazine at that time. He asked what kind of cake I wanted, so I just handed him the magazine and sure enough he made it…he was probably 18 or 19 and did not have a lot of baking experience, but did a great job. The cake was superb containing many of my favorite flavors…cheese, chocolate, and orange. It was along the lines of a Sicilian cassata, but not as dense. The sponge cake was light, the ricotta/cannoli like filling was studded with candied orange peel and dark chocolate, and the top was covered with chocolate ganache—pure heaven!
 |
| Simmer the peels |
Of course I intended to make it again sometime, but when I went back to clip the recipe, I could not find the magazine. Over the ensuing years, I thought about that cake, but never searched out the recipe until this year. The recipe actually called for candied fruit rather than orange peel, so I suppose you could use that, but trust me, the orange peel is divine. So, I had to candy the peel, because I have never found a good candied citrus peel on the market. And I’m sure it would cost more than I’d be willing to pay if I did find it.
 |
| After the peels have been scraped |
It's not a difficult process; you just need to devote a bit of time to it. I usually buy organic navels, and save the peel in a baggy in the frig until I have about 6 oranges worth of peel. Then I put them in a stainless pot, cover with water, and simmer until the white is very soft and can be scraped or easily cut off the rind and discarded. I then cut the remaining peel into small pieces and place in syrup made by bringing to a boil, 1 ½ cups sugar, ¾ cup water, and a scant ½ tsp of cream of tartar. Simmer the peel in the syrup about ½ hour or until it appears translucent.
 |
| Straining the peels |
Turn up the heat to medium/medium high and boil until a candy thermometer reads about 230—a lot of the syrup will have boiled off and the peel will be glossy. Strain and cool then toss with a few tbsp of sugar.
 |
| The finished product! |
I’ve also eaten strips of candied orange peel of which one half had been dipped in chocolate, so you could candy it in most any shape. And of course you can candy any kind of citrus peel I suppose. But I have an affinity for orange, especially with chocolate, and if my cake turns out I’ll show you why!
Wednesday, March 9, 2011
Meyer Lemon Almond Torte - Or a cake that dared to be different
I made this torte the other day. It was an experiment in baking (not wise) that turned out good (lucky). I actually brought it to guests (OK, in-laws) for dessert and had no clue what it was going to taste like.
Fortunately it was delicious, or to quote my sistah-in-law Bliss, "F'in fabulous!" This was yet another recipe I tweaked; it was supposed to be a "cake." However, the substitution of almond meal flour for regular flour turned it into something very different. I have actually tweaked the recipe below a bit more because I don't think it needed all the oil or sugar I originally used. If you try it and it comes out of the oven with a concave shape, don't freak out. The edges should be pliable enough to push down to level it out a bit. This will make for a beautifully chewy "crust." And any other mistakes (I'll spare you the details here) can be covered up with the frosting.
2 ½ cups almond meal flour
1 teaspoon baking powder
½ teaspoon baking soda
½ teaspoon salt
3 Large eggs
1 ½ cups sugar
½ cup canola or corn oil
½ cup plus 2 tablespoons fresh Meyer lemon juice (divided)
2 teaspoons grated lemon zest (divided)
2 ½ teaspoons vanilla extract (divided)
1 cup sour cream
5 tablespoons (2/3 stick) unsalted butter, room temperature
4 ounces cream cheese, room temperature
2 cups powdered sugar
 Oil bottom, sides 9-inch or 10-inch springform pan. Line bottom of pan with wax paper or parchment paper and oil the paper. Preheat oven to 325 degrees.
Sift flour, baking powder, baking soda and salt into medium bowl and set aside. In a large bowl, beat eggs and sugar with electric mixer on medium speed until thickened and lightened to a cream color, about 2 minutes.
On low speed, mix in oil, ½ cup lemon juice, 1 teaspoon lemon zest and 2 teaspoons vanilla until blended. Blend in flour mixture and incorporate the two, then mix in sour cream until no white streaks remain.
Pour batter into prepared pan. Bake on center rack of preheated oven until top feels firm and a toothpick inserted into center comes out clean, about 1 hour.
Let cake rest in pan 15 minutes, then run a knife around edge of cake and center tube to loosen it. When cooled, invert onto a serving plate. Discard paper liner. Leave cake, bottom side up, to cool and frost.
In large bowl, using electric mixer on low speed, beat butter, cream cheese, remaining 2 tablespoons lemon juice, remaining 1 teaspoon lemon zest and remaining 1/2 teaspoon vanilla until smooth. Beat in powdered sugar until frosting is smooth and fluffy, about 2 minutes.
Use a spatula to spread frosting over top, sides and in center hole of cake. Cake can be covered and stored in refrigerator up to 3 days. Serve cold or at room temperature. Makes 12 servings.
Oil bottom, sides 9-inch or 10-inch springform pan. Line bottom of pan with wax paper or parchment paper and oil the paper. Preheat oven to 325 degrees.
Sift flour, baking powder, baking soda and salt into medium bowl and set aside. In a large bowl, beat eggs and sugar with electric mixer on medium speed until thickened and lightened to a cream color, about 2 minutes.
On low speed, mix in oil, ½ cup lemon juice, 1 teaspoon lemon zest and 2 teaspoons vanilla until blended. Blend in flour mixture and incorporate the two, then mix in sour cream until no white streaks remain.
Pour batter into prepared pan. Bake on center rack of preheated oven until top feels firm and a toothpick inserted into center comes out clean, about 1 hour.
Let cake rest in pan 15 minutes, then run a knife around edge of cake and center tube to loosen it. When cooled, invert onto a serving plate. Discard paper liner. Leave cake, bottom side up, to cool and frost.
In large bowl, using electric mixer on low speed, beat butter, cream cheese, remaining 2 tablespoons lemon juice, remaining 1 teaspoon lemon zest and remaining 1/2 teaspoon vanilla until smooth. Beat in powdered sugar until frosting is smooth and fluffy, about 2 minutes.
Use a spatula to spread frosting over top, sides and in center hole of cake. Cake can be covered and stored in refrigerator up to 3 days. Serve cold or at room temperature. Makes 12 servings.
Subscribe to:
Posts (Atom)